Posted on Leave a comment

Hap-bee New Year!

Happy New Year! Firstly I want to thank you for your support through 2021. I know many of you that read our blog regularly also come and see us at markets, on local delivery runs or support us via one of our stockists and have become very loyal to our honey – which is something I cannot thank you enough for.

As we’ve been coming up to the end of the year I’ve been doing a lot of thinking about all that we have achieved throughout 2021. I’m really happy to say that we have taken on lots of new stockists and packing customers this year which has really helped to move our business up a level. We have filled around 16,000 jars in the past 12 months – it’s really making the 9 jars I filled in my first year beekeeping look extra small!

Beekeeping experiences have also proved very popular, after 2020 when we couldn’t run many courses 2021 seemed a welcome change and we ran well over 50 sessions. It’s looking like 2022 will be just as busy and as many have asked for them we have listened and are now providing full day introduction to beekeeping courses for those wishing to take on beekeeping as a hobby.

Beekeeping Experience Hive protected from Mice this winter using a mouse guard

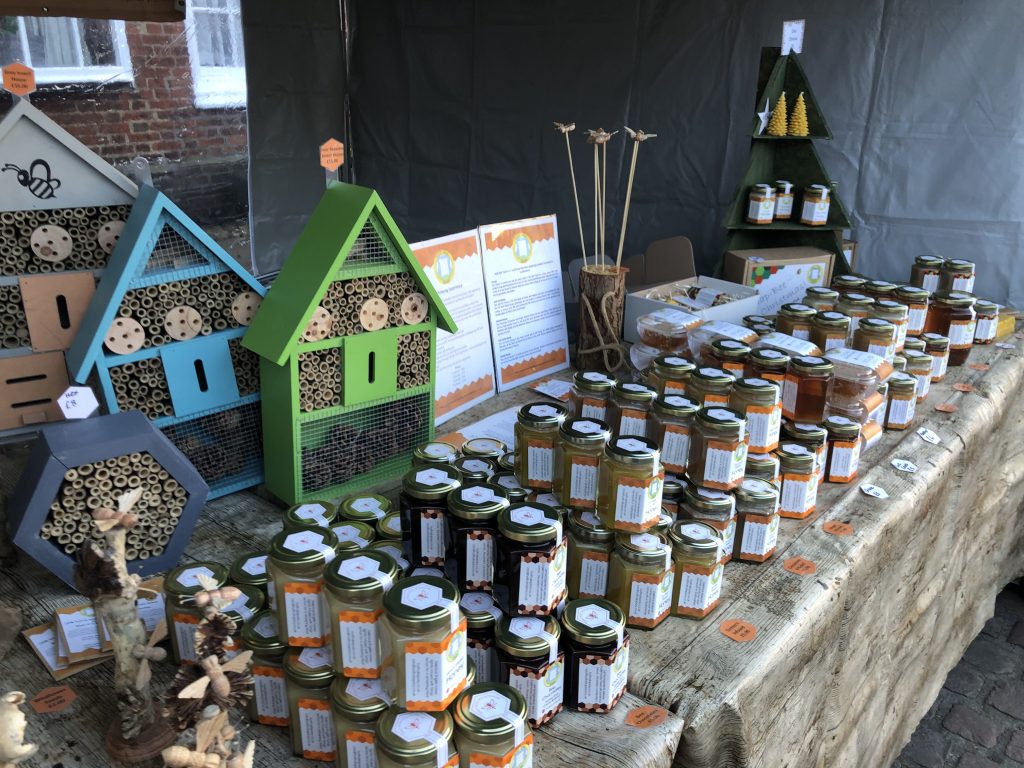
One of the most exciting things about this year has been the return to markets and shows. As a small business a lot of our revenue is earned at farmers markets and shows and we have been so lucky that so many of you have come out and supported us and fellow stall holders, especially in the run up to Christmas.

We now have a small winter break from markets, we will only be attending Market Bosworth Farmers Market this month which is on the 23rd January.


This Months Recip-bee

Bee Berry Breakfast

And just like that we are into 2022, with this in mind, we have chosen a recipe that will kick start your year and give a twist on the classic consumption of crumpets. We used frozen berries for this breakfast recipe and found that the juice really helped to deliver a great flavour when paired with the honey drizzled on top! As always, please share feedback and photos!

Ingredients

Method:

  1. Toast the Crumpets until golden brown and spread the Almond or peanut butter generously over them
  2. Place your chosen berries on top of the crumpets and drizzle over the honey!
  3. Enjoy straight away while warm for a delicious start to your day!

Thank you all for reading our blog and your continued support in helping our small business grow, I’m excited to write this blog article again in 12 months time to see how much we have managed to grow.

Matthew Ingram
Holt Hall Apiary

Processing…
Success! You're on the list.
Posted on Leave a comment

Our Honey Room Is Complete!

I’m happy to say that our honey room has now been complete for about two weeks, I’m really happy with it and the transformation from its previous use as a disused milking parlour to its new lease of life is unbeliveable!

Our first real use of the new honey room (other than storage) was processing Heather Honey. We’ve been really happy with our crop producing over 25lb per hive that went to the Heather Moors. The very best comb is used to make our Cut Comb, then the smaller peices of comb get used for Chunk Honey and everything else gets pressed through a machine called a Screw Press which squeezes out the honey, and leaves us with beeswax that we can use for our wax products. The honey is then filtered and jarred to produce our limited edition Heather Honey.

Back to our new room, my grandpa stopped milking in 1991 and since then, the milking parlour has mainly be used for strorage. The first job was to strip out all of the old electrics and take out the large ceiling that was used to house the feed that would drop down to the cattle while they were being milked. Taking the ceiling out really made a mess and it was hard to see just what it would become, but the next job was just as big. The milking parlour trench had to be uncovered and filled in with the new floor drains fitted.

The insulated panels arrived next, and with some help we managed to get the panels and roof up in around three days. We knocked through to our existing honey room and the flooring company were then in for a few days to level the floor and put down the new flooring!

Unfortuantely the door was one of the last things to arrive due to shipping issues but that meant there was plenty of time for the electrians and plumbers to get finished off. The new room has two heated pods which can heat up to around 45 degrees which is as hot as we need for warming honey. Each pod would warm up to 1,800 kg of honey, far more than we need at the moment but it’s been built with expansion in mind!


This Month’s Recip-bee

Honey Honey Comb! (Adapted from BBC Good Food)

Happy November! We have decided to go for a classic this month relating to Bonfire Night, which is known for Cinder Toffee. In a true Holt Hall Apiary style, we have shaken things up by literally putting the honey in honeycomb. This recipe was made with our warming Cinnamon Honey, but would work with any of our honeys! As always, please share pictures of your creations to info@holthallapiary.co.uk

Ingredients:

  • 200g caster sugar
  • 5 tbsp Honey
  • 2 tsp bicarbonate of soda

Method:

  • STEP 1 – Butter a 20cm square tin. Stir the caster sugar and Honey together in a deep saucepan over a gentle heat until the sugar has melted. Try not to let the mixture bubble until the sugar grains have disappeared.
  • STEP 2 – Once completely melted, turn up the heat a little and simmer until you have an amber coloured caramel (this won’t take long), then as quickly as you can, turn off the heat, tip in the bicarbonate of soda and beat in with a wooden spoon until it has all disappeared and the mixture is foaming. Scrape into the tin immediately – be careful, the mixture will be very hot.
  • STEP 3 – The mixture will continue bubbling in the tin, simply leave it and in about 1 hr-1 hr 30 mins the honeycomb will be hard and ready to crumble or snap into chunks.

This month we have two markets so please make sure you come along and see us for Christmas gift inspiration!

13th & 14th November – Open Air Country Fair, Planters at Bretby 10am – 3:30pm
28th Novemeber – Market Bosworth Farmers Market, 9am – 1:30pm

Thank you all for reading our blog, I’m hoping as winter arrives and I get more time I will be able to share more with you and show you some more of our honey room and spring preparation!

Matthew Ingram
Holt Hall Apiary

Processing…
Success! You're on the list.
Posted on 1 Comment

Happy July!

Well I’m sure I start each blog by saying how fast the month has gone and this month really is no different! I have to admit cutting this one very close to the line for my writing deadline but hopefully I can tell you lots about our honey extracting this month.

Usually in early June we would be extracting our spring crop however around then there was next to nothing on the hives, we had even had to feed them to keep starvation at bay but the weather finally broke at the end of May, start of June and about a month behind the normal flow we finally started to see supers filling with honey! It turned out that although it was late the bees were ready and waiting and as soon as the conditions were there they managed to start collecting at a fantastic pace. The spring crop that usually starts in April through to the end of May has been matched in just 2 or 3 weeks this year.

So although we were delayed the crop was good. We have finished extracting now and it was an exciting time as we had a few new bits of equipment.

We remove the cappings using one of the new bits of equipment we have got for this season. The Uncapper as its aptly named has two blades which slice off the wax and expose the honey.

Once the frames are free of cappings we place them into a honey extractor which spins the frames round very quickly so that the honey flys out and drains down the tank into a waiting bucket!

From the buckets we put it in the warmer to make the honey slightly runnier to put through a straining cloth to remove all of the bits of wax that we don’t want to end up in the jars! That’s all there is to our honey, you couldn’t get a purer more natural product!

Firstly the frames come in their boxes from the hives. We use a device called a clearing board which is like a one way valve for bees so that the boxes are empty of bees when they come to be extracted.

When the pallet comes in the frames are capped with wax so our first job before we can extract the honey is to remove the wax cappings that the bees have made to store the honey.

The uncapper above is using blades to expose the honey below it. You can see the yellow honey at the bottom and the thin layer of wax being removed.


This Month’s Recip-bee

American Pancakes!
Serves 4

With the launch of the new Bee Chocolatey honey, I thought, hmm there are so many things that this would work with, so this recip-bee of the month was so hard to choose!! But my favourite meal of the day is breakfast and what meal isn’t perfect with banana and cocoa honey spread! Pancakes always remind me of the song in Matilda, I very much enjoyed playing this while I made them, but this is optional when you make these!! The toppings can be amended to whatever you want, I think this cocoa honey would work perfectly with Greek yoghurt or strawberries too! As always, send us pictures and comments on how you get on!
 Best Wishes
Emma!

Ingredients:

Method:

  1. Sift the flour, baking powder, salt and caster sugar into a large bowl. In a separate bowl or jug, lightly whisk together the milk and egg, then whisk in the melted butter.
  2. Pour the milk mixture into the flour mixture and, using a fork, beat until you have a smooth batter. Any lumps will soon disappear with a little mixing. Let the batter stand for a few minutes.
  3. Heat a non-stick frying pan over a medium heat and add a knob of butter. When it’s melted, add a ladle of batter (or two if your frying pan is big enough to cook two pancakes at the same time). It will seem very thick but this is how it should be. Wait until the top of the pancake begins to bubble, then turn it over and cook until both sides are golden brown and the pancake has risen to about 1cm/½in thick.
  4. Repeat until all the batter is used up. You can keep the pancakes warm in a low oven, but they taste best fresh out the pan.

As always thank you for reading, hopefully you’ve learnt a little something about extracting honey and if you want to learn more make sure you follow our social media pages as we often post up other little facts and photos as the month goes on!

Matthew Ingram
Holt Hall Apiary

Processing…
Success! You're on the list.
Posted on Leave a comment

January Jarring!

Well another month in lockdown has gone by but we’ve been very busy jarring honey! The warmer days in the last week have seen the bees making the most of the sun, they’ve been really active and have been finding the first snow drops that are just coming into flower.

As promised in last months blog I’m going to talk you through how we get the honey in the jar! Extracting honey is a different topic and we will cover that in the summer when we are extracting this years honey! This month as well as our own honey we have been busy jarring honey for another honey brand, we have done around 4,000 jars for them so far.


The Jarring Process!

The honey comes to us in 30lb buckets, although in the next couple of weeks we will be expanding so we can take barrels of honey. Barrels of honey are standard amongst big producers and hold 300kg of honey.

As soon as we get the honey, we put it straight in the warmers, they allow us to carefully warm the honey to around 40 degrees being careful not to go over 40 which would impact the taste and quality of the honey.

In the photos above you will see:

Top Left: The buckets of honey sat waiting to be jarred, each one is enough to fill around 60 jars.
Top Right: Inside the warmer, our warmer holds 15 buckets, 5 on each level. there is a heater above and below to ensure they all warm evenly
Bottom Left: The jarring machine uses gears to push just the right amount of honey out into the jars! It can take any size jar, we simply tell it how much to dispense and then calibrate it with the first few jars, we check every 10th jar to make sure nothing has changed and the jars are being filled properly!
Bottom Right: The jars packed into boxes and palletised ready to go out to the customer!

As honey naturally crystallises the buckets are sometimes solid, it can take just hours to get the honey runny enough to jar and other times it can take several days to a week. We will check the honey several times everyday and jar it as soon as it’s clear so that we aren’t warming the honey for longer than we need to!

The honey buckets are emptied into a tank that holds about 75kg and it’s piped directly into the jarring machine. We push the jar under and it automatically dispenses the correct amount of honey, we add the lid and make sure its on tight before adding the anti-tamper labels, best before dates and main label.

The other type of honey that’s very popular is Soft Set, it’s a silky-smooth white honey that is perfect to spread. This honey is a bit trickier to get right. We can start with any sort of honey, we warm it up so it is completely runny there can’t be any granules, we then add around 10% of soft set honey to the runny honey. Over the next few days of stirring, the runny honey starts to set like the soft set honey we added. We then jar it and the honey sets over the next few days, ready for you to enjoy on your toast!


This Month’s Reci-Bee!

Honey, Ginger & Pumpkin Seed Scones

(Adapted from National Trust Book of Scones by Emma Taylor)

Ingredients:

500g Plain Flour
2 tsp Baking Powder
100g Caster Sugar
1 tbsp Ground Ginger
125g Butter/Margarine
25g Grated Ginger
3 tsp Pumpkin Seeds
2 tbsp Runny Honey (or honey of your choice)
1 large egg, beaten
Approx. 150ml Milk (or milk alternative)

I LOVE a scone, I think they are super simple to make and are perfect for elevenses or with a cup of tea in the afternoon! In a perfect world I would make these to share with family, however I will have to sit and indulge myself with a cup of tea and a film! This recipe lends itself to Holt Hall Apiary’s Runny Honey, but for an extra Ginger kick for the fiery ginger lovers out there, feel free to use Ginger Infused Honey . Or this will give a beautiful flavour if you used the newest development – Lemon Infused for the perfect pairing of Lemon & Ginger!

Method:

Step 1 – Preheat the oven to 190°C/180°C fan. Line a baking sheet with greaseproof paper.

Step 2 – Sieve the flour, baking powder, sugar and ground ginger into a mixing bowl. Using your fingertips, rub in the butter until the mixture resembles fine crumbs. Stir in the pumpkin seeds.

Step 3 – Add the honey, beaten egg, grated ginger and milk to the bowl and mix to make a soft dough (you may not need all of this, save it for brushing the tops of the scones).

Step 4 – Turn out onto a lightly surface, and gently press with your hand, until the dough is 4cm thick (it’s thicker than you realise! My first attempt was too thin!!). Stamp out with a 7cm cutter (your choice on smooth or crimped edges). Any trimmings, bring together to form more scones (waste not want not!).

Step 5 – Brush the tops with milk, or a little egg if you have any left, and bake for 15-20 minutes until golden brown.

Step 6 – Delicious warm, with butter or more honey!

Would love to see pictures, please share them to info@holthallapiary.co.uk.

Thank you for reading our blog, hopefully you’ll have a good idea of how your honey got into it’s jar! I’m looking forward to sharing the process of how we get the honey directly from our hives to you when the season starts!

Matthew Ingram
Holt Hall Apiary

Processing…
Success! You're on the list.
Posted on 1 Comment

Hap-Bee New Year!

Happy New Year! What a difference a year makes, this time last year I was enjoying my time in Sydney before heading back up the coast to the bee farm I was working on. Corona Virus then was just being spoken about in the news but was isolated to China, who could have imagined what it would become!

I need to thank everyone who has supported Holt Hall Apiary in what has been a different but surprisingly good year for us. We met all the targets we set last year for the number of hives we wanted and took on several new stockists and customers for our jarring and extracting services. We have been increasingly well supported at our markets with great turn outs and lot’s of people coming back to us for their honey which we love to see!

Looking towards 2021

It seems already that it’s going to be a very busy year! January will see us contract jarring (Jarring honey for someone else) around 2,500 jars for a customer we worked with towards the end of 2020.

Hive building and frames are well underway now I still have around 80 boxes left to make but that’s a job I can be doing along side other things so long as they are finished by March.

We are planning to get up to around 150 hives this year and really push towards maximising honey production and especially producing more Heather honey as it proved so popular. Our home reared queens have also been popular with a small waiting list already.

The bees are doing well, we are checking the hives weight every two weeks or so just to make sure they have enough, those that haven’t get a kilo of bakers fondant which gives the bees instant sugar without them needing to do much processing which is hard when its cold outside.

Bees eating the fondant

This Month’s Reci-Bee!

Honey & Gingerbread Loaf

(Adapted from BBC Good Food by Emma Taylor)

This cake is super simple to make but gives a beautiful festive flavour to bring a close to another year of festivities. I would eat this cake straight out the oven if I could! This is wonderful, on its own, slathered with butter or if you are feeling creative, why not try it with Greek Yoghurt and some berries as a festive brunch option! It’s what I will be doing!

This recipe will lend itself to many of the Holt Hall Apiary honeys available, each will give a slightly different flavour, why not try it with a few and see which you think is best!

Method

Step 1 – Heat the oven to 180°C/160°C fan/gas 4 and butter and line a 900g loaf tin. Put the honey, butter and sugar in a saucepan and warm over a low heat, stirring occasionally, until the butter has melted, and the sugar dissolved. Remove from the heat and pour in the vanilla extract, then set aside to cool. If you are as eager as I was to get this cake in the oven, keep stirring the mixture off the heat to help reduce the temperature.

Step 2 – Sieve the flour into a bowl with the baking powder, mixed spice and a pinch of salt. Add the egg and milk, then gently fold in along with the cooled melted butter mixture. Once combined, tip into the prepared tin, place on a baking tray, and bake for 40 mins until springy to the touch and a skewer inserted into the middle comes out clean. Leave to cool for 10 mins in the tin, then place on a cooling rack and leave to cool completely. 

Step 3 – Enjoy in any way you want!

Will keep in an airtight container for up to four days

Ingredients:

100g Butter, plus extra to grease the tin (or you can use a tin liner)

100g Ginger Infused Honey (I found this one worked best, but Runny Honey would also work, just add an extra pinch of Mixed Spice in!)

125g Soft Brown Sugar

½ tsp Vanilla Extract

200g Self Raising Flour

¼ tsp Baking Powder

1 ½ tsp Mixed Spice

Pinch of Salt

1 egg, beaten

4 tbsp Milk


Next Months blog we will be talking about jarring honey, how we get it from the hive into the jars ready for you to enjoy! If you make this month’s reci-bee (I highly recommend you do, it tastes amazing!) then please do send us your photo or tag us in it on Facebook or Instagram.

As ever thank you for reading our blog, your support really does mean a great deal.

Matthew Ingram
Holt Hall Apiary

Processing…
Success! You're on the list.